This is a follow up write up from the recent workshop at Andela on building a blockchain decentralised application. An assumption of this blog is that you already have an understanding of what blockchain is and what Ethereum is. But for those who you can view my presentation here and the follow here. They are quite simple to follow .
So what do we want to build. We want to build a voting application. A very simple one at that. Ethereum allows us to build centralised application and solidity is the language we are using to use along side javascript application as the front end. To setup our journey we will need the following applications installed as dependencies.
1. Node Package Manager (NPM):
2. Truffle
3. Ganache
4. Metamask
Node Package Manager
This allows us to manage and use packages from node.js. You can confirm on your system if you have it by typing on your command line
$ npm -v
Truffle
This npm package allows us to build decentralized applications on the Ethereum blockchain. It allows us to test our smart contracts on our local blockchain copy and deploy the contracts on to the main blockchain network. You can install the version of truffle to use with the project by using the command below
$ npm install -g truffle@4.1.15
Ganache
This application allows you to have 10 different fake accounts and fake ether. You can download it from here https://truffleframework.com/ganache
Metamask
It is an extension in chrome that we can use to interact with the local blockchain we start up or with the main ethereum blockchain. We will be using it in course of this application so you will want to search google for metamask extension and then install in on your chrome browser
We will proceed to develop our application both with solidity and javascript. However we will also write tests to make sure we are going in the right direction. One more thing depending on your editor, you may want to search out the plug-in to use for solidity syntax highlighting. This will help in writing the solidity code and show keywords etc.
For this tutorial, i will be using vscode as the IDE and solidity plugin by Juan Blanco
Step One:
First, open up the ganache application and you should see something like this

What you see above is 10 different accounts generated for you by ganache, and though in my own copy some accounts have less than 100 eth, yours should have 100 eth in all of the accounts. On the right most side of each account is a symbol like a key. This icon when clicked will show you your private key for the current account and can be used to import the account to different networks. This will be shown later.
Now lets start. Choose a location on your system and lets create a folder like what we have below
$ mkdir election
$ cd election
Now we are inside our folder we want to get up and running fast with a truffle project already existing. So within the election folder run the command below
$ truffle unbox pet-shop
If you are having challenges downloading the truffle’s pet-shop app you can always download it from the repository by using the following command within the election folder
$ git clone https://github.com/truffle-box/pet-shop-box.git .
In this tutorial, i used VSCode and you can open the current folder with this command
code .
After the above you should have the following in your view in whatever IDE you use.

Lets go through what we have here:
- contracts directory: this is where we will be keeping all of our smart contracts. Already you can see that we have a migration contract inside that handles our migrations to the blockchain.
- migrations directory: this is where all of the migration files live. If you have developed in other frameworks that have ORM you will notice that this is something familiar. Whenever we deploy smart contracts to the blockchain, we are updating the blockchain’s state, and therefore need a migration.
- node_modules directory: this is the home of all of our Node dependencies.
- src directory: this is where we’ll develop our client-side application.
- test directory: this is where we’ll write our tests for our smart contracts.
- truffle-config.js file: this is the main configuration file for our Truffle project
- truffle-box.json file: this file contains some commands that can be used in the project
Before we go further, you may want to create a repository for your project and initialize the current folder and map the current folder to that repository.
Then we start writing our smart contracts. For unix like users you can use the command below,
$ touch contracts/Election.sol
and for windows users you can do this.
The next thing to do paste this into your Election.sol file
pragma solidity 0.4.24;

contract Election {
    // Read/write candidate
    string public candidate;

    // Constructor
    constructor () public {
        candidate = "Candidate 1";
    }
}
Let me explain the above code
The first line declares the version of solidity you wish you write your code in. This is done first in all solidity smart contracts. The declaration of the smart contract is started with the keyword contract just like in OOP, you start a class with the keyword class. Next we declared a candidate string and make it public. In other backend languages like c# or java, the public keyword will come before string. Also in solidity declaring the variable candidatepublic will generate a free getter function from solidity.
Next is the contructor function, this function gets called whenever the smart contract is deployed to the blockchain. If you are new to OOP programming, a constructor function is usually where you initialize variables and objects within the function.
Next we want to deploy our contract to the blockchain, but first we need to create a migration file for it. In the migration, folder you will notice one file there that starts with the number 1. We will number our migration files, so as to define the order the migration will be deployed. Create a new migration file with the name ‘ 2_deploy_contracts.js’ via the IDE or from the command line like this $ touch migration/2_deploy_contracts.js
Copy the code below into the file
var Election = artifacts.require("./Election.sol");

module.exports = function(deployer) {
  deployer.deploy(Election);
};
Next we run from the terminal or console the following commands
$ truffle migrate
After the migration is completed, we want to interact with our deployed smart contract. At the terminal type
$ truffle console
You should see a console with the prompt like this $ truffle<development>:
Then type the command below or copy and paste:
$ Election.deployed().then(function(instance) {app=instance})
Election is the name of the contract we created earlier and we retrieved a deployed instance of the contract with the deployed()function, and assigned it to an app variable inside the promise’s callback function.
After entering the above code you should see $ undefinedthis should not worry you as it just means the process is done. However we now have a variable appthat can be used to call the candidate like this.
$ app.candidate()
Now we are here you have deployed your smart contract and you can retrieve from it.
Step Two:
Now we go to the next step of our application. We need to store more properties of our candidate like id, name, number of votes and we need a way to store more than one candidate. So we will use the struct type and mappingtype to achieve this respectively.
Struct is a type in solidity that allows you to create your structure in solidity and mapping is like an associative array or hash with key-value pairing allowed. You can view more types in the documentation of the version of solidity we are using here. Our election code will be modified to look like this
contract Election {
    // Model a Candidate
    struct Candidate {
        uint id;
        string name;
        uint voteCount;
    }

    // Read/write Candidates
    mapping(uint => Candidate) public candidates;

    // Store Candidates Count
    uint public candidatesCount;

    // ...
}
Our candidate model has an un-signed integer type for id, string type for name and un-signed integer type for voteCount. We will need to instantiate this candidate in our constructor and assign them values.
We also see in the code above, we declared a mapping type to be used to store the list of candidates and the key to the mapping is an un-signed integer.
We also keep track of all candidates in the mapping as the mapping structure in solidity doesn’t allow for declaring a size of the mapping. Instead the mapping structure returns values based on the key passed to it. For example if we have a mapping with just 5 candidates, and we try to retrieve from the mapping a candidate with the unsigned integer 50, we will get an empty candidate structure. If a key is not found is returns an empty result. Read more on mapping here.
Next lets create a function to add our candidate to the mapping structure with the code below.
contract Election {
    // ...

    function addCandidate (string _name) private {
        candidatesCount ++;
        candidates[candidatesCount] = Candidate(candidatesCount, _name, 0);
    }
}
We’ve declared the function addCandidate that takes one argument of string type that represents the candidate’s name. Inside the function, we increment the candidate counter cache to denote that a new candidate has been added. Then we update the mapping with a new Candidate struct, using the current candidate count as the key. This Candidate struct is initialized with the candidate id from the current candidate count, the name from the function argument, and the initial vote count to 0. Note that this function’s visibility is private because we only want to call it inside the contract.
If you are coming from the c# or java background you will notice that the keywords public and private are used to declare the function or property but are placed after the argument in functions and after type in variable declaration.
Now we can add candidates to our election app by calling the above function in the constructor like this
contract Election {
    // ...

    constructor () public {
        addCandidate("Candidate 1");
        addCandidate("Candidate 2");
    }

    // ...
}
When we migrate our application again to the blockchain, two candidates will be automatically created. At this point our code should look like what we have below:
pragma solidity ^0.4.24;

contract Election {
    // Model a Candidate
    struct Candidate {
        uint id;
        string name;
        uint voteCount;
    }

    // Read/write candidates
    mapping(uint => Candidate) public candidates;

    // Store Candidates Count
    uint public candidatesCount;

    constructor () public {
        addCandidate("Candidate 1");
        addCandidate("Candidate 2");
    }

    function addCandidate (string _name) private {
        candidatesCount ++;
        candidates[candidatesCount] = Candidate(candidatesCount, _name, 0);
    }

}
Now we can run our migration again using the reset command resetlike this
$ truffle migrate --reset
And now we have a working smart contract. Next to confirm what we have done so far, enter the truffle console like we did earlier and enter this same command as earlier
Election.deployed().then(function(instance) {app=instance})This time to retrive a candidate we have to enter the below code
app.candidates(1)
Here we are entering the candidates index value . we can replace 1 with 2 and see what we get back.
Writing Tests
Next create a test file name ‘election.js’ under tests folder. Truffle framework comes with mocha testing framework and chai library to run our tests. Lets paste the code below in our file.
var Election = artifacts.require("./Election.sol");

contract("Election", function(accounts) {
  var electionInstance;

  it("initializes with two candidates", function() {
    return Election.deployed().then(function(instance) {
      return instance.candidatesCount();
    }).then(function(count) {
      assert.equal(count, 2);
    });
  });

  it("it initializes the candidates with the correct values", function() {
    return Election.deployed().then(function(instance) {
      electionInstance = instance;
      return electionInstance.candidates(1);
    }).then(function(candidate) {
      assert.equal(candidate[0], 1, "contains the correct id");
      assert.equal(candidate[1], "Candidate 1", "contains the correct name");
      assert.equal(candidate[2], 0, "contains the correct votes count");
      return electionInstance.candidates(2);
    }).then(function(candidate) {
      assert.equal(candidate[0], 2, "contains the correct id");
      assert.equal(candidate[1], "Candidate 2", "contains the correct name");
      assert.equal(candidate[2], 0, "contains the correct votes count");
    });
  });
});
Lets go through this file. We have imported our Election contract into this test file and created a test contract instance while injecting our accounts to be used for the testing. We have actually written two main tests and these tests tests for
1. The number of candidates initalized.
2. The values of the candidate object initialized with proper values.
To see if our test is fine, we can execute the following command.
$ truffle test
Phew!!! what a long way we have come but if you happen to get stuck along the way you can get the repository from online.
Our Client Application
We download the truffle pet-shop template because it allows us to quickly setup a lot of stuff. So its like a bootstrap template we have gotten to quickly setup and go. The template folder comes with html , css and js files. We do not wish to dwell too much on the client application building aspects of this, so we will replace that javascript file and the index.html file with this codes below
First we start with app.js file
App = {
  web3Provider: null,
  contracts: {},
  account: '0x0',

  init: function() {
    return App.initWeb3();
  },

  initWeb3: function() {
    if (typeof web3 !== 'undefined') {
      // If a web3 instance is already provided by Meta Mask.
      App.web3Provider = web3.currentProvider;
      web3 = new Web3(web3.currentProvider);
    } else {
      // Specify default instance if no web3 instance provided
      App.web3Provider = new Web3.providers.HttpProvider('http://localhost:7545');
      web3 = new Web3(App.web3Provider);
    }
    return App.initContract();
  },

  initContract: function() {
    $.getJSON("Election.json", function(election) {
      // Instantiate a new truffle contract from the artifact
      App.contracts.Election = TruffleContract(election);
      // Connect provider to interact with contract
      App.contracts.Election.setProvider(App.web3Provider);

      return App.render();
    });
  },

  render: function() {
    var electionInstance;
    var loader = $("#loader");
    var content = $("#content");

    loader.show();
    content.hide();

    // Load account data
    web3.eth.getCoinbase(function(err, account) {
      if (err === null) {
        App.account = account;
        $("#accountAddress").html("Your Account: " + account);
      }
    });

    // Load contract data
    App.contracts.Election.deployed().then(function(instance) {
      electionInstance = instance;
      return electionInstance.candidatesCount();
    }).then(function(candidatesCount) {
      var candidatesResults = $("#candidatesResults");
      candidatesResults.empty();

      for (var i = 1; i <= candidatesCount; i++) {
        electionInstance.candidates(i).then(function(candidate) {
          var id = candidate[0];
          var name = candidate[1];
          var voteCount = candidate[2];

          // Render candidate Result
          var candidateTemplate = "<tr><th>" + id + "</th><td>" + name + "</td><td>" + voteCount + "</td></tr>"
          candidatesResults.append(candidateTemplate);
        });
      }

      loader.hide();
      content.show();
    }).catch(function(error) {
      console.warn(error);
    });
  }
};

$(function() {
  $(window).load(function() {
    App.init();
  });
});
Now replace the index.html with the code below:
<!DOCTYPE html>
<html lang="en">
  <head>
    <meta charset="utf-8">
    <meta http-equiv="X-UA-Compatible" content="IE=edge">
    <meta name="viewport" content="width=device-width, initial-scale=1">
    <title>Election Results</title>

    <!-- Bootstrap -->
    <link href="css/bootstrap.min.css" rel="stylesheet">
  </head>
  <body>
    <div class="container" style="width: 650px;">
      <div class="row">
        <div class="col-lg-12">
          <h1 class="text-center">Election Results</h1>
          <hr/>
          <br/>
          <div id="loader">
            <p class="text-center">Loading...</p>
          </div>
          <div id="content" style="display: none;">
            <table class="table">
              <thead>
                <tr>
                  <th scope="col">#</th>
                  <th scope="col">Name</th>
                  <th scope="col">Votes</th>
                </tr>
              </thead>
              <tbody id="candidatesResults">
              </tbody>
            </table>
            <hr/>
            <p id="accountAddress" class="text-center"></p>
          </div>
        </div>
      </div>
    </div>

    <!-- jQuery (necessary for Bootstrap's JavaScript plugins) -->
    <script src="https://ajax.googleapis.com/ajax/libs/jquery/1.12.4/jquery.min.js"></script>
    <!-- Include all compiled plugins (below), or include individual files as needed -->
    <script src="js/bootstrap.min.js"></script>
    <script src="js/web3.min.js"></script>
    <script src="js/truffle-contract.js"></script>
    <script src="js/app.js"></script>
  </body>
</html>
Let’s take note of a few things that the App.js code does:
- Set up web3: web3.js is a javascript library that allows our client-side application to talk to the blockchain. We configure web3 inside the “initWeb3” function.
- Initialize contracts: We fetch the deployed instance of the smart contract inside this function and assign some values that will allow us to interact with it.
- Render function: The render function lays out all the content on the page with data from the smart contract. At this point we are only listing the candidates that were created in the smart contract and rendering it in a table. We also fetch the current account that is connected to the blockchain inside this function and display it on the page.
For the html, its a simple html webpage. It nothing complicated.
Now let’s view the client-side application in the browser. First, make sure that you’ve migrated your contracts like this:
$ truffle migrate --resetNext, start your development server from the command line like this:
$ npm run devThis should automatically open a new browser window with your client-side application.
Make sure your local blockchain is running in ganache. If yours is not running make sure that the port number in ganache is the same with the port number in the truffle-config.js file.
Also make sure you are logged into metamask and import one or two accounts from the ganache set of accounts into metamask.
Importing account into metamask:
Step 1: In you running ganache app pick one of the account you wish to import and click on the key at the right most side.
Step 2: Open your metamask in your chrome browser. Login if you have not.
Step 3: Select a localhost Network out of the different networks you see available there (localhost:8545)
Step 4: Click on icon on the top right corner and select import account.
Step 5: Paste the private key there and your account has been successfully imported.
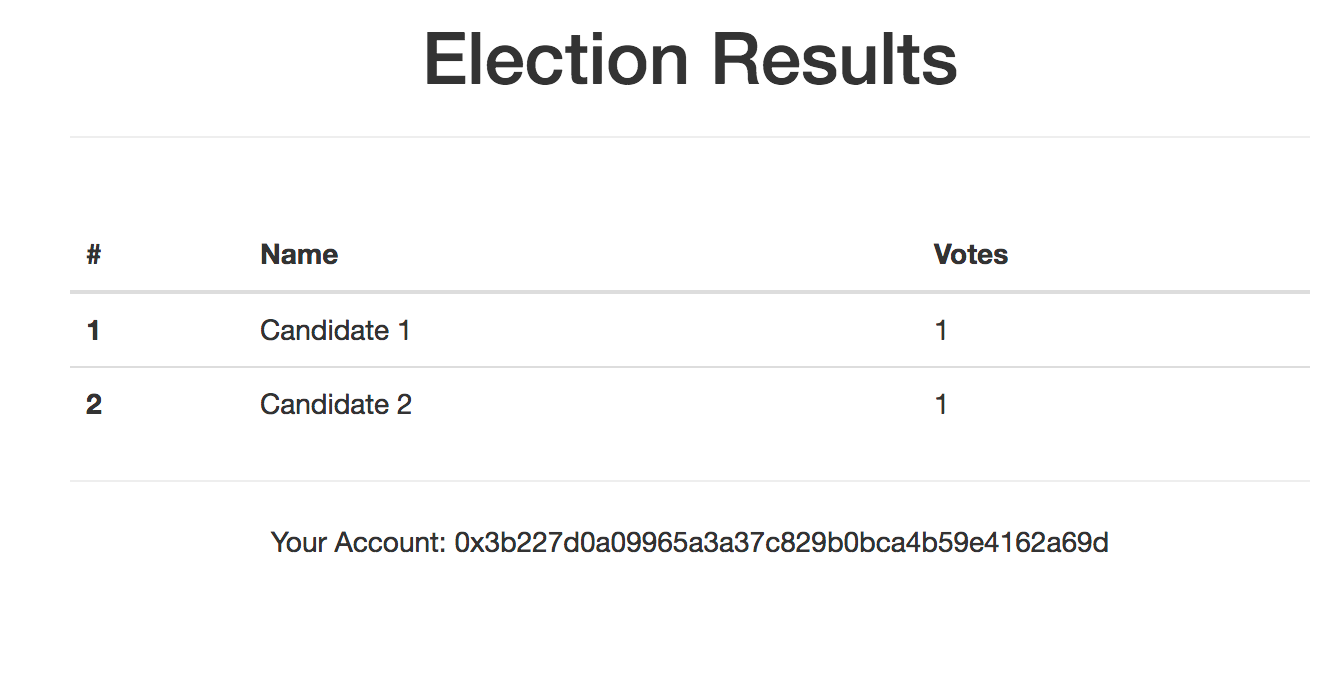
Once that is done when you refresh the application you should see this
Step 3: Voting
Now we need to allow our application accept voting. Let’s work on this functionality. Under the mapping we declared for candidates, we will declare another mapping for votes.
// Store accounts that have voted
mapping(address => bool) public voters;
We will also add a function for voting to the Election contract
function vote (uint _candidateId) public {
        // require that they haven't voted before
        require(!voters[msg.sender]);

        // require a valid candidate
        require(_candidateId > 0 && _candidateId <= candidatesCount);

        // record that voter has voted
        voters[msg.sender] = true;

        // update candidate vote Count
        candidates[_candidateId].voteCount ++;
    }
The core functionality of this function is to increase the candidate’s vote count by reading the Candidate struct out of the “candidates” mapping and increasing the “voteCount” by 1 with the increment operator (++). Let’s look at a few other things that it does:
- It accepts one argument. This is an unsigned integer with the candidate’s id.
- Its visibility is public because we want an external account to call it.
- It adds the account that voted to the voters mapping that we just created. This will allow us to keep track that the voter has voted in the election. We access the account that’s calling this function with the global variable “msg.sender” provided by Solidity.
- It implements require statements that will stop execution if the conditions are not met. First require that the voter hasn’t voted before. We do this by reading the account address with “msg.sender” from the mapping. If it’s there, the account has already voted. Next, it requires that the candidate id is valid. The candidate id must be greater than zero and less than or equal to the total candidate count.
The complete Election.sol should look like this:
pragma solidity ^0.4.25;

contract Election {
    // Model a Candidate
    struct Candidate {
        uint id;
        string name;
        uint voteCount;
    }

    // Store accounts that have voted
    mapping(address => bool) public voters;
    // Read/write candidates
    mapping(uint => Candidate) public candidates;
    // Store Candidates Count
    uint public candidatesCount;

    function Election () public {
        addCandidate("Candidate 1");
        addCandidate("Candidate 2");
    }

    function addCandidate (string _name) private {
        candidatesCount ++;
        candidates[candidatesCount] = Candidate(candidatesCount, _name, 0);
    }

    function vote (uint _candidateId) public {
        // require that they haven't voted before
        require(!voters[msg.sender]);

        // require a valid candidate
        require(_candidateId > 0 && _candidateId <= candidatesCount);

        // record that voter has voted
        voters[msg.sender] = true;

        // update candidate vote Count
        candidates[_candidateId].voteCount ++;
    }
}
Testing the Voting Functionality
Now let’s add a test to our “election.js” test file:
it("allows a voter to cast a vote", function() {
    return Election.deployed().then(function(instance) {
      electionInstance = instance;
      candidateId = 1;
      return electionInstance.vote(candidateId, { from: accounts[0] });
    }).then(function(receipt) {
      return electionInstance.voters(accounts[0]);
    }).then(function(voted) {
      assert(voted, "the voter was marked as voted");
      return electionInstance.candidates(candidateId);
    }).then(function(candidate) {
      var voteCount = candidate[2];
      assert.equal(voteCount, 1, "increments the candidate's vote count");
    })
  });
We want to test two things here:
- Test that the function increments the vote count for the candidate.
- Test that the voter is added to the mapping whenever they vote.
Next we can write a few test for our function’s requirements. Let’s write a test to ensure that our vote function throws an exception for double voting:
it("throws an exception for invalid candidates", function() {
    return Election.deployed().then(function(instance) {
      electionInstance = instance;
      return electionInstance.vote(99, { from: accounts[1] })
    }).then(assert.fail).catch(function(error) {
      assert(error.message.indexOf('revert') >= 0, "error message must contain revert");
      return electionInstance.candidates(1);
    }).then(function(candidate1) {
      var voteCount = candidate1[2];
      assert.equal(voteCount, 1, "candidate 1 did not receive any votes");
      return electionInstance.candidates(2);
    }).then(function(candidate2) {
      var voteCount = candidate2[2];
      assert.equal(voteCount, 0, "candidate 2 did not receive any votes");
    });
  });
We can assert that the transaction failed and that an error message is returned. We can dig into this error message to ensure that the error message contains the “revert” substring. Then we can ensure that our contract’s state was unaltered by ensuring that the candidates did not receive any votes.
Now let’s write a test to ensure that we prevent double voting:
it("throws an exception for double voting", function() {
    return Election.deployed().then(function(instance) {
      electionInstance = instance;
      candidateId = 2;
      electionInstance.vote(candidateId, { from: accounts[1] });
      return electionInstance.candidates(candidateId);
    }).then(function(candidate) {
      var voteCount = candidate[2];
      assert.equal(voteCount, 1, "accepts first vote");
      // Try to vote again
      return electionInstance.vote(candidateId, { from: accounts[1] });
    }).then(assert.fail).catch(function(error) {
      assert(error.message.indexOf('revert') >= 0, "error message must contain revert");
      return electionInstance.candidates(1);
    }).then(function(candidate1) {
      var voteCount = candidate1[2];
      assert.equal(voteCount, 1, "candidate 1 did not receive any votes");
      return electionInstance.candidates(2);
    }).then(function(candidate2) {
      var voteCount = candidate2[2];
      assert.equal(voteCount, 1, "candidate 2 did not receive any votes");
    });
  });
First, we’ll set up a test scenario with a fresh account that hasn’t voted yet. Then we’ll cast a vote on their behalf. Then we’ll try to vote again. We’ll assert that an error has occurred here. We can inspect the error message, and ensure that no candidates received votes, just like the previous test.
Now let’s run our tests:
$ truffle testYay, they pass! 
The Actual Voting
Let’s add a form that allows accounts to vote below the table in our “index.html” file:
<form onSubmit="App.castVote(); return false;">
  <div class="form-group">
    <label for="candidatesSelect">Select Candidate</label>
    <select class="form-control" id="candidatesSelect">
    </select>
  </div>
  <button type="submit" class="btn btn-primary">Vote</button>
  <hr />
</form>
Let’s examine a few things about this form:
- We create the form with an empty select element. We will populate the select options with the candidates provided by our smart contract in our “app.js” file.
- The form has an “onSubmit” handler that will call the “castVote” function. We will define this in our “app.js” file.
Next we need to update our app.js file to be able to handle both of the processes above. We want a dropdown so that candidates can be listed and selected. Remember you may wish to use an radio button for this also. Then we will hide the form when the account has voted. Remember we will the voter to vote only once.
render: function() {
  var electionInstance;
  var loader = $("#loader");
  var content = $("#content");
loader.show();
content.hide(); // Load account data
web3.eth.getCoinbase(function(err, account) {
if (err === null) {
App.account = account;
$("#accountAddress").html("Your Account: " + account);
}
}); // Load contract data
App.contracts.Election.deployed().then(function(instance) {
electionInstance = instance;
return electionInstance.candidatesCount();
}).then(function(candidatesCount) {
var candidatesResults = $("#candidatesResults");
candidatesResults.empty(); var candidatesSelect = $('#candidatesSelect');
candidatesSelect.empty(); for (var i = 1; i <= candidatesCount; i++) {
electionInstance.candidates(i).then(function(candidate) {
var id = candidate[0];
var name = candidate[1];
var voteCount = candidate[2]; // Render candidate Result
var candidateTemplate = "<tr><th>" + id + "</th><td>" + name + "</td><td>" + voteCount + "</td></tr>"
candidatesResults.append(candidateTemplate); // Render candidate ballot option
var candidateOption = "<option value='" + id + "' >" + name + "</ option>"
candidatesSelect.append(candidateOption);
});
}
return electionInstance.voters(App.account);
}).then(function(hasVoted) {
// Do not allow a user to vote
if(hasVoted) {
$('form').hide();
}
loader.hide();
content.show();
}).catch(function(error) {
console.warn(error);
});
}Next, we need to write a function that is called when the submit button is clicked, ie we cast a vote. See below:
castVote: function() {
    var candidateId = $('#candidatesSelect').val();
    App.contracts.Election.deployed().then(function(instance) {
      return instance.vote(candidateId, { from: App.account });
    }).then(function(result) {
      // Wait for votes to update
      $("#content").hide();
      $("#loader").show();
    }).catch(function(err) {
      console.error(err);
    });
  }
First, we query the contract for the candidateId in the form. When we call the vote function from our smart contract, we pass in this id, and we provide the current account with the function’s “from” metadata. This will be an asynchronous call. When it is finished, we’ll show the loader and hide the page content. Whenever the vote is recorded, we’ll do the opposite, showing the content to the user again.
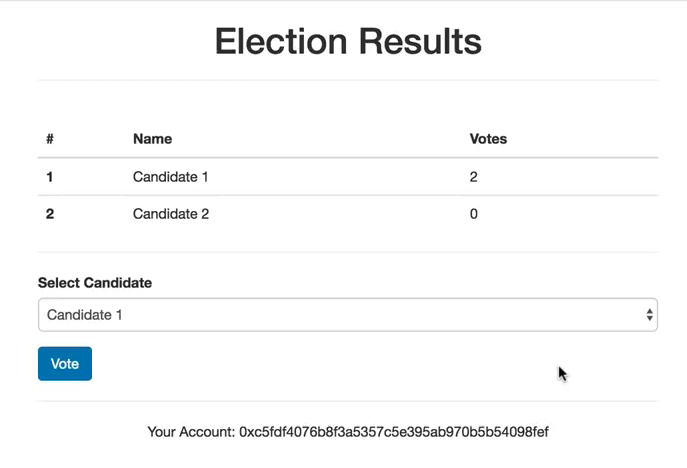
Now your front-end application should look like this:
Go ahead and try the voting function. Once you do, you should see a Metamask confirmation pop up like this:
Depending on your system it may open a new tab instead of a new pop-up window.
Once you click submit, you’ve successfully casted a vote! You’ll still see a loading screen. For now, you’ll have to refresh the page to see the votes recorded. We’ll implement the functionality update the loader automatically in the next section.
Step 4: Watch Events
The thing we want to add to our application is disable the submit button whenever a vote is cast. We do this by triggering an event. This will allow us to update our client-side application when an account has voted. We will start by declaring an event in our contract like this:
contract Election {
    // ...
    event votedEvent (
        uint indexed _candidateId
    );
    // ...
}
Now we can trigger this “votedEvent” event inside our “vote” function like this:
function vote (uint _candidateId) public {
    // require that they haven't voted before
    require(!voters[msg.sender]);
// require a valid candidate
require(_candidateId > 0 && _candidateId <= candidatesCount); // record that voter has voted
voters[msg.sender] = true; // update candidate vote Count
candidates[_candidateId].voteCount ++; // trigger voted event
votedEvent(_candidateId);
}Now that we’ve updated our contract, we must run our migrations:
$ truffle migrate --resetWe can also update our tests to check for this voting event like this:
it("allows a voter to cast a vote", function() {
  return Election.deployed().then(function(instance) {
    electionInstance = instance;
    candidateId = 1;
    return electionInstance.vote(candidateId, { from: accounts[0] });
  }).then(function(receipt) {
    assert.equal(receipt.logs.length, 1, "an event was triggered");
    assert.equal(receipt.logs[0].event, "votedEvent", "the event type is correct");
    assert.equal(receipt.logs[0].args._candidateId.toNumber(), candidateId, "the candidate id is correct");
    return electionInstance.voters(accounts[0]);
  }).then(function(voted) {
    assert(voted, "the voter was marked as voted");
    return electionInstance.candidates(candidateId);
  }).then(function(candidate) {
    var voteCount = candidate[2];
    assert.equal(voteCount, 1, "increments the candidate's vote count");
  })
});
This test inspects the transaction receipt returned by the “vote” function to ensure that it has logs. These logs contain the event that was triggered. We check that the event is the correct type, and that it has the correct candidate id.
New we have to update the client -side application. We want to make sure that the application listens for the voted event and fires a page refresh any time that it is triggered. We can do that with a “listenForEvents” function like this:
listenForEvents: function() {
  App.contracts.Election.deployed().then(function(instance) {
    instance.votedEvent({}, {
      fromBlock: 0,
      toBlock: 'latest'
    }).watch(function(error, event) {
      console.log("event triggered", event)
      // Reload when a new vote is recorded
      App.render();
    });
  });
}
This function does a few things. First, we subscribe to the voted event by calling the “votedEvent” function. We pass in some metadata that tells us to listen to all events on the blockchain. Then we “watch” this event. Inside here, we log to the console anytime a “votedEvent” is triggered. We also re-render all the content on the page. This will get rid of the loader after the vote has been recorded, and show the updated vote count on the table.
Finally, we can call this function whenever we initialize the contract:
initContract: function() {
  $.getJSON("Election.json", function(election) {
    // Instantiate a new truffle contract from the artifact
    App.contracts.Election = TruffleContract(election);
    // Connect provider to interact with contract
    App.contracts.Election.setProvider(App.web3Provider);
App.listenForEvents(); return App.render();
});
}Now, you can vote on your client-side application, and watch the votes recorded in real time! Be patient, it might take a few seconds for the event to trigger. If you don’t see an event, try restarting Chrome. There is a known issue with Metamask surrounding events. Restarting Chrome always fixes it for me.
Congratulations! And there you have it. You have successfully built a full stack decentralized application on the Ethereum blockchain! Whew!
The post Building a Blockchain De-centralised Application (Dapp) with Solidity on Ethereum + Javascript with tests. appeared first on Andela.